API Connector Documentation
Import AdRoll Data to Google Sheets
In this guide, we’ll walk through how to pull AdRoll data data directly into Google Sheets, using the API Connector add-on for Sheets.
There are two ways to connect to the AdRoll API:
- Preset "Connect" button (OAuth)
- Personal access token + API key. Please check the appendix for detailed instructions to retrieve your credentials.
Contents
- Before You Begin
- Part 1: Connect to the AdRoll API
- Part 2: Pull Data from AdRoll to Sheets
- Part 3: Fetch and Append New Data
- Part 4: Create a Custom Request
- Part 5: API Documentation
- Appendix: Connect with a Personal Access Token
Before You Begin
Click here to install the API Connector add-on from the Google Marketplace.
Part 1: Connect to the AdRoll API
The easiest way to get started with the AdRoll API is through API Connector’s built-in integration.
- In Sheets, open API Connector and create a new request (Extensions > API Connector > Open > Create request)
- Select AdRoll from the drop-down list of applications

- Under Authorization, click Connect to AdRoll

- You be asked to authorize the connection. Click Authorize.

- You'll then be returned to your Google Sheet, and can verify that your AdRoll connection is active.
Part 2: Pull Data from AdRoll to Sheets
Now that we’re connected, let’s pull some data into Sheets.
- Select the
/report/adendpoint, which allows us to retrieve available analytics reports from AdRoll
- In the
data_formatparameter, choose your report type. You can choose to break down your report by date, by entity (ad), or view a summary report.
- Optionally select a reporting time period using the
start_dateandend_dateparameters. - Choose a destination sheet, name your request, and hit Run. You will see your report in your sheet.

Part 3: Fetch and Append New Data
Rather than retrieving the entire data set each time you run your request, you can set your request to fetch new data only. There are a few approaches you could take; here’s one:
- Run an initial request to the
/report/adendpoint, setting thedata_formatparameter to 'date', and setting thestart_dateandend_dateparameters to fetch historical data. - Use the field editor to select just the fields you want and assign them to specific columns in your report.
- Create a new sheet called Inputs that contains date functions in the mm-dd-yyyy format required by AdRoll, e.g.
=text(B2,"mm-dd-yyyy"). (Use Sheets functions to dynamically get the time slice you need, e.g. here’s how to dynamically pull in the last day of the month). - Switch your request to Append mode and reference those dynamic date cells in your request URL like this:
+++Inputs!C2+++
- This will ensure that each request only retrieves data from within the bounds of your dynamically updated dates, and append mode will add that new data to the end of your existing dataset.
- Set your request to run on a schedule. You won’t need to update your request again.
Part 4: Create a Custom Request
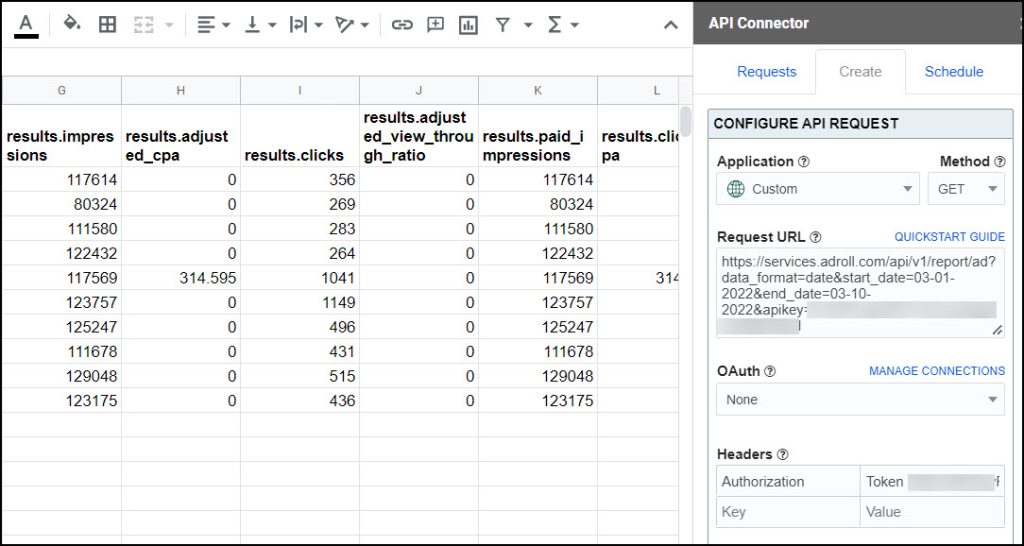
Alternatively, you can run your own custom requests instead of using API Connector’s pre-built integration, using any of the endpoints and parameters shown in the API documentation. To create a custom request, add your complete URL into the Request URL field, and choose AdRoll from the OAuth menu (or connect with a token). Here's an example request setup:
- Application:
Custom - Method:
GET - Request URL:
https://services.adroll.com/api/v1/report/ad?data_format=date&start_date=03-01-2022&end_date=03-10-2022 - OAuth:
AdRoll
Part 5: API Documentation
Official documentation: https://apidocs.nextroll.com/crud-api/reference.html
Appendix: Connect with a Personal Access Token + Key
This method is an alternative to the method described above. Instead of clicking Connect, retrieve your own personal token and API key.
- First, get the API key. To get your API key, create a developer account at https://developers.nextroll.com/accounts/create
- Click Apps from the drop-down menu (or navigate to https://developers.nextroll.com/my-apps/new-app)

- Fill out the new app form, which includes a) giving your app a name, b) clicking Enable next to Starter API Access, and c) providing a callback URL (this can be anything, e.g. https://google.com). Click Save.
- You'll now see your API key. Copy this down.

- Now, we'll get the API token. Log in to the AdRoll dashboard and click the gear icon in the left sidebar to open the Settings menu.
- In the Settings menu click Personal Access Tokens (or just navigate directly to https://app.adroll.com/settings/personal-access-tokens)

- Click New to add a new token
- You'll be prompted to give your token a name (it can be anything). Click Save.
- You'll now see your token. Copy it and keep it safe as it won't be displayed again.

- OK, we're done. Finally! We have our token and key and can now make a request. The API key should be appended to the end of your URL in the
apikeyparameter, while the API token shold be included in a header, where the Key = Authorization and the value = Token your_token.


