
This is the fourth and final post in a series on design patterns for tracking events in Google Analytics (GA) using Google Tag Manager (GTM). This pattern combines developer pushes from the data layer with tags and variables in GTM. It describes the case where a single tag is set through a combination of data layer pushes and GTM tags & variables (not the more general case where some tags are set by a data layer and some are set through auto-event tracking).
Below are the most common methods of collecting site interaction data using GTM to send event tracking data to GA.
Method 1: GTM's Built-In Interaction Tracking (aka Auto-Event Tracking)
Method 2: Custom HTML and JS Tags in GTM
Method 3: Developer Pushes to a Pass-Through Data Layer
Method 4 (this post): Combined Auto-Event + Data Layer
METHOD 4: COMBINED AUTO-EVENT & DATA LAYER
Advantage: The advantage of this method is that you can ideally pick and choose the advantages of developer vs. GTM-focused implementations. It's useful for tracking items that can't be easily tracked by GTM, such as a modal automatically opening, while retaining the testing benefits and flexibility of GTM.
Disadvantage: Using multiple methods in a single implementation can be harder to troubleshoot, since if something goes wrong you'll need to check both the data layer push and the GTM tag setup to identify the cause. For the same reason, maintenance can also become confusing as it's not always obvious what should be set where. Finally, it still retains all the caveats that apply to any of the individual methods, as described in earlier posts.
IMPLEMENTATION STEPS OVERVIEW
- Have your developers push event names into the data layer
- Create a new Universal Analytics tag in GTM with Track Type = Event.
- Populate the Category, Action, and Label fields with text and/or variables that dynamically change. Often you will use a combination of these. Make sure to create a logical naming strategy that will make sense later on.
- Add a trigger using the event name that was pushed into the data layer.
DETAILED IMPLEMENTATION EXAMPLE:
STEP 1: PUSH INFORMATION TO A DATA LAYER
In this method, your developers push information to a data layer using the following syntax:
dataLayer.push({
'event': 'eventName'
});
So an example for a modal opening could be:
dataLayer.push({
 'event': 'modalOpen'
 });
The event name will change based on the specific activity or action you're measuring.
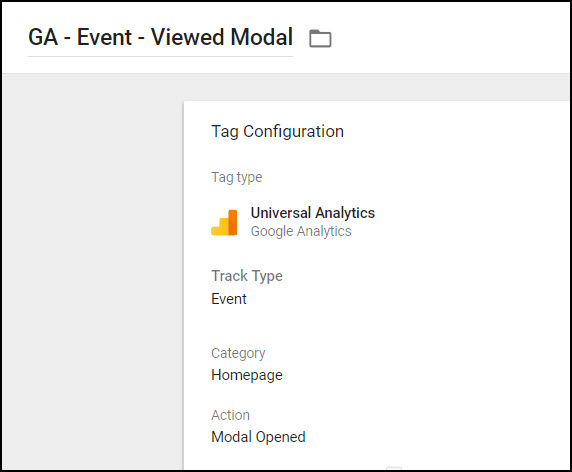
STEP 2: CREATE A NEW EVENT TAG IN GTM
Create a new Universal Analytics tag in GTM by clicking Tags > New > Tag Type = Universal Analytics, Track Type = Event.
STEP 3: POPULATE THE EVENT CATEGORY, ACTION, AND LABEL
Name the tag and populate the event fields. Here I named it GA – Event – Viewed Modal, and populated it with Category = Homepage, Action = Viewed Modal.
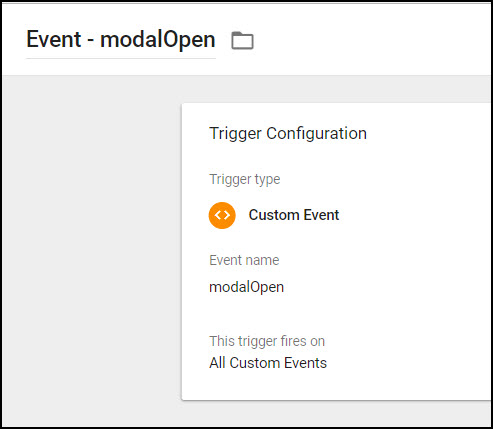
STEP 4: ADD A TRIGGER
Under your tag, click "Choose a trigger to make this tag fire" , and then the plus sign to add a new trigger.
Choose the following for your new trigger:
- Trigger Type: Other - Custom Event
- Event Name: modalOpen
- This Trigger Fires On: All Custom Events
STEP 5: COMPLETE THE TAG
Preview, test, and Publish.
CONCLUSION
With this implementation, any time your site developers push an event named "modalOpen" into the data layer, your event tag will fire containing the names you selected for the category, action, and label. This method can be very effective for targeting certain actions or site elements that are difficult to track using GTM alone, while retaining the flexibility to name events as you like.